söndag 22 oktober 2023

Dreadtober 5

Final steps... and I am done with the Dreadtober challenge.


Since the last post I have added some metal paint to the pistons. I also added some blue and brown ink to the pistons to give it some more life. Blue close to the sleeve, representing some fresh oil and brown close to the end of the piston to represent old oil. I am not sure this can be seen at any distance but I know it is there and it is how I usually do pistons. I also did up the socked balls and the ratchet rods for the hammers using a slightly different rusted metal method than what I used on the main body. Instead of starting with a black and orange base I used lead belcher as a base, inked it brown, red, orange and black before the four colour drybrush. This still gives the metal a slight red-bron tone as if it has some rust but it is till shiny metal. Once the metals were done I added a blue lens to the chest (body cam?). I also made the edge lights on the shields blue but I am not sure they pop enough, might redo them green or red to get some contrast to the other colours on the shield. I also went over the face plates a bit, smoothing out the colour gradients a bit, not sure it made any huge difference. 

Once I was done with all the painting I stated to assemble all the sub assemblies and disaster struck. For some un known reason I glued one of the small shield to the wrong shoulder piece and when I removed it it took a large chunk of the paint with it. So I had to try and repaint this. As I did not want to strip it totally and restart with a base spray I opted for painting directly onto the resin. This is not something I generally do as the paint will not stick as well as with the base spray, But since it is a small area on a model that will probably not see much handling I decided that it would do.


So I stared with a base goat of back paint followed with a base green, brown ink, three layers of drybrush, brown ink and another three layers of drybrush and I was bask at the base green of the armour.
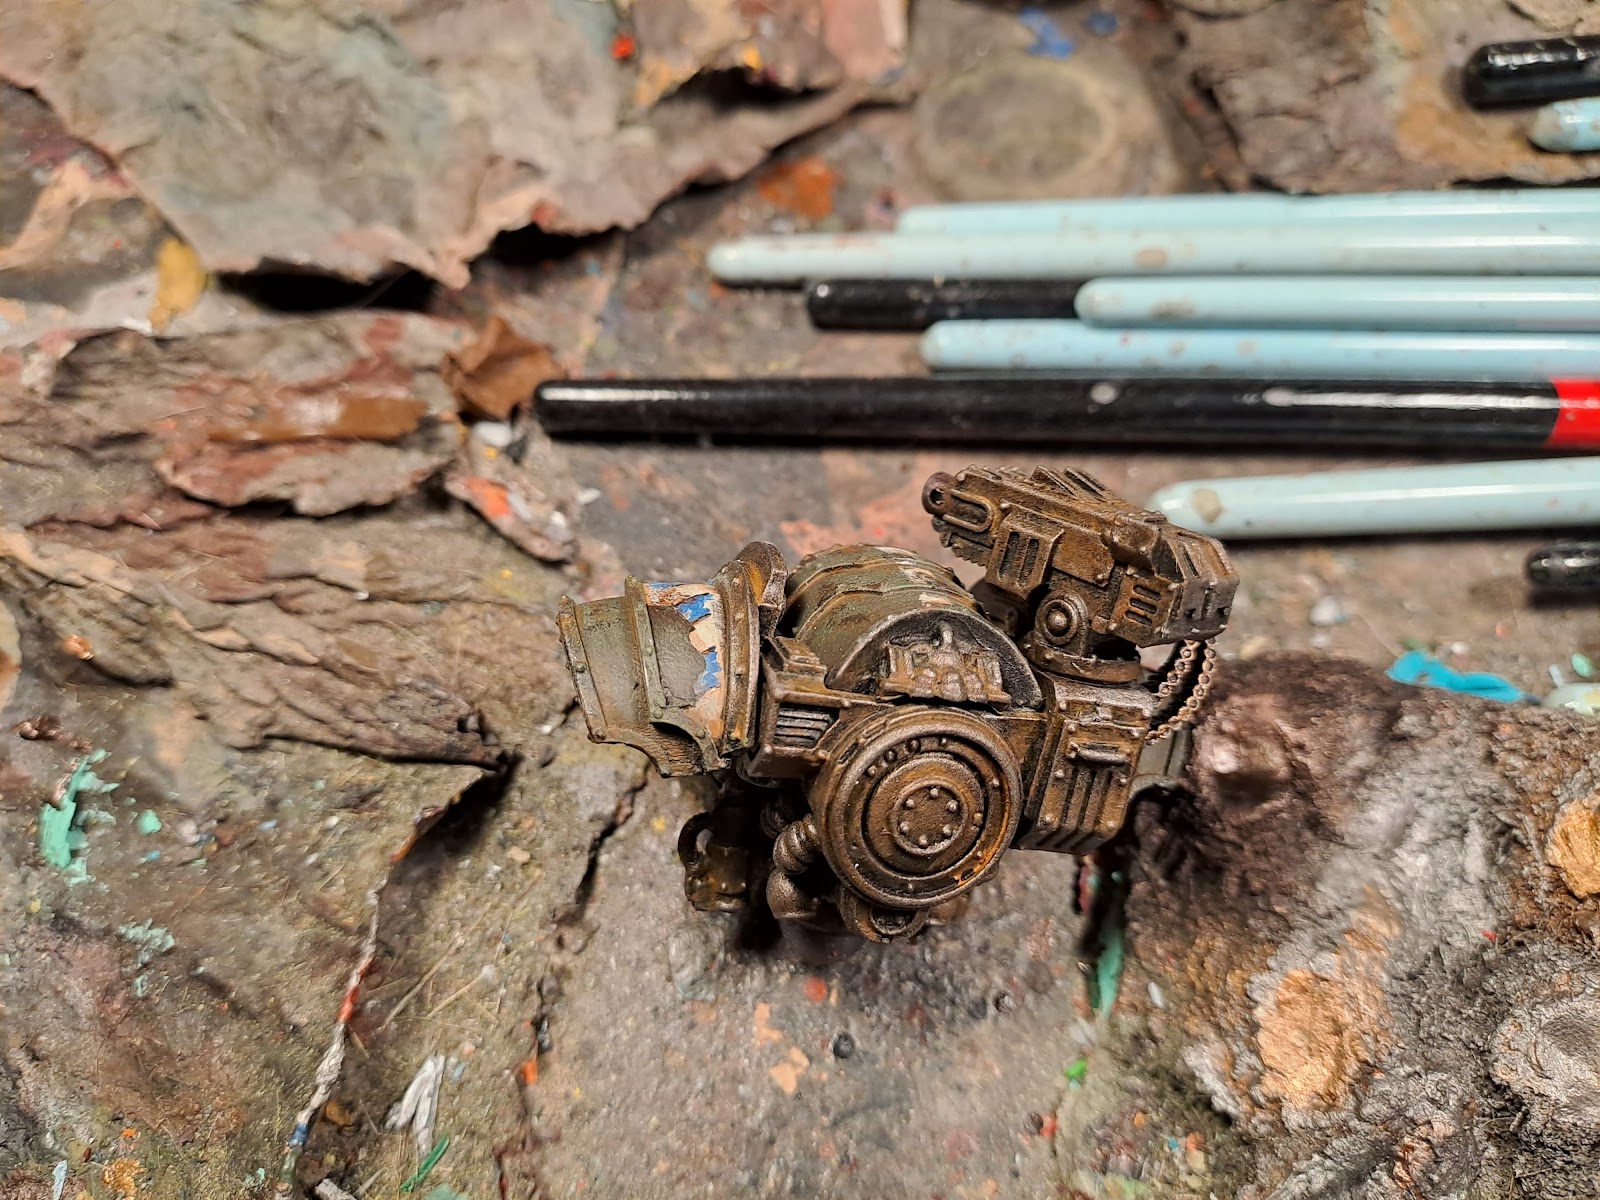

Then I added the orange ink and brown and orange paints for the rust. I skipped the sponge shipping in this area as it look fairly ok. It is a bit different but not strikingly so.


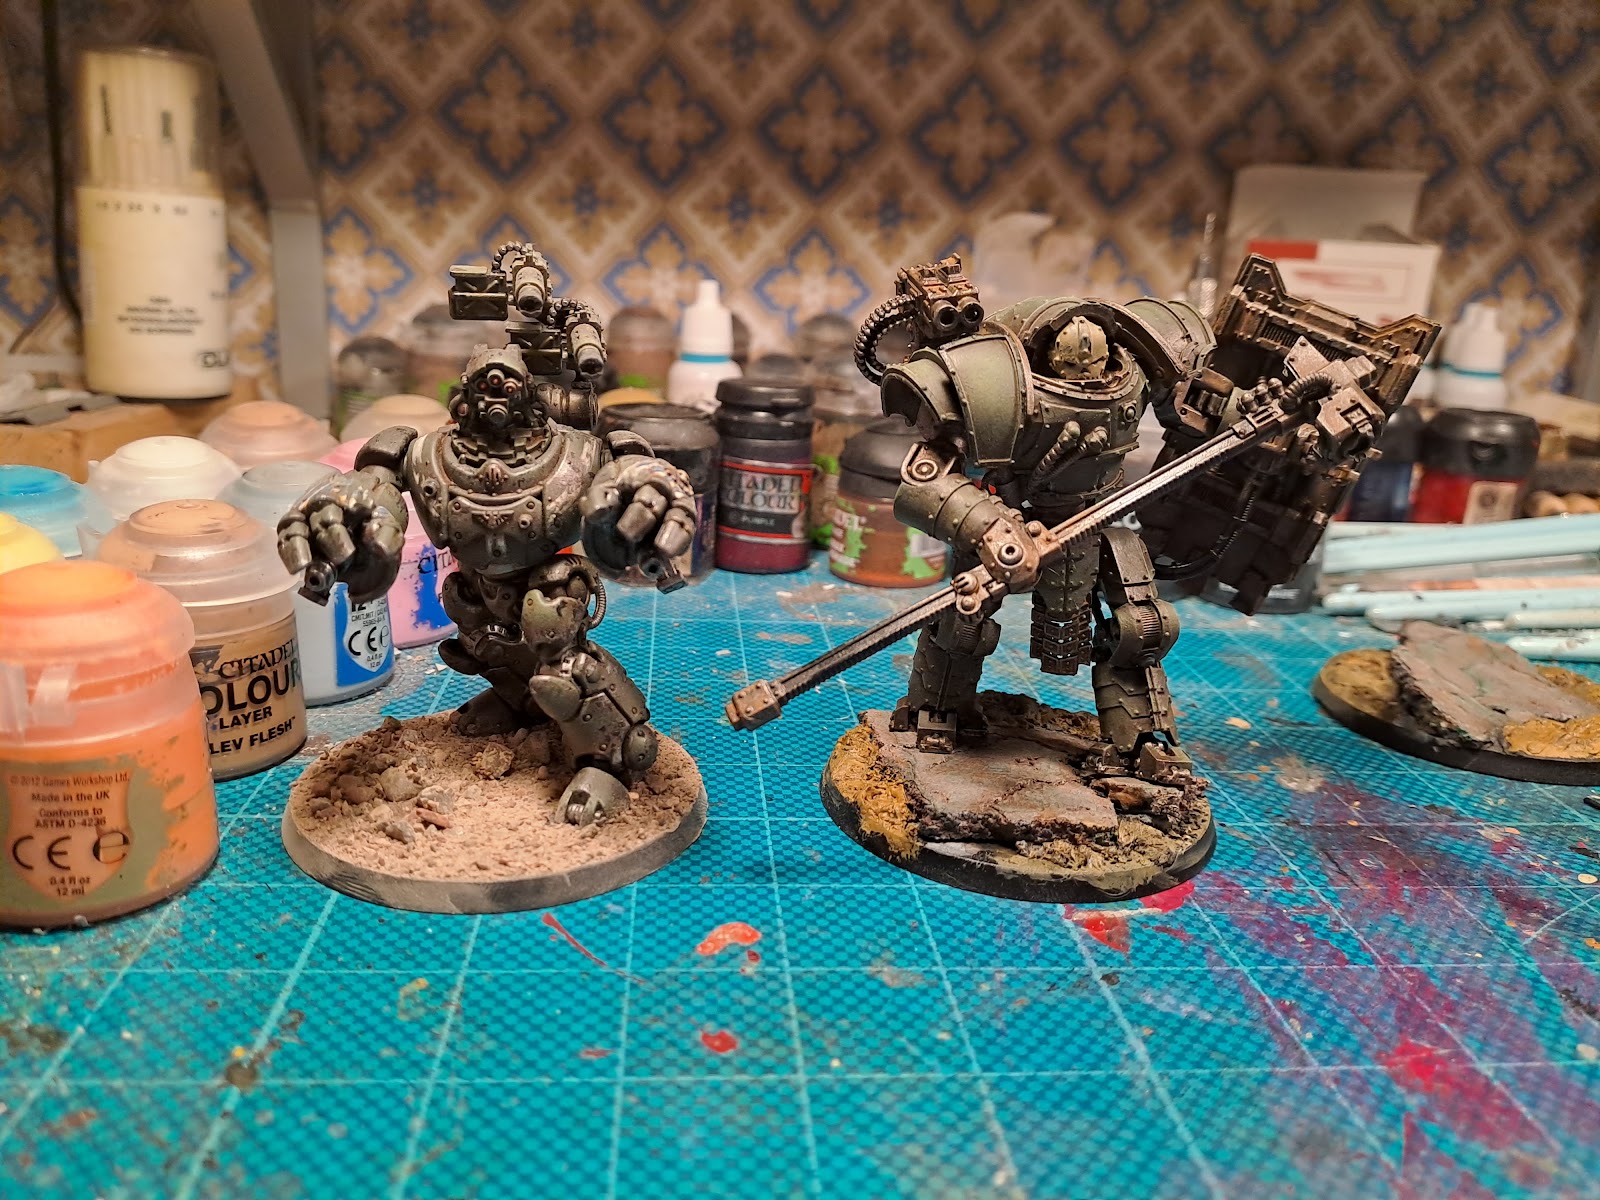
Later in the week I will take some better picture with my normal light rigg and backdrop. But here are some pictures of the front and back as well as some scale shots with a mechanicum robot.





onsdag 18 oktober 2023

Dreadtober 4


This week have not seen much progress on the iron circle Domitars as I have been await with work. Since I have been home I have added the blue white chevrons to the shoulders and top of the shields. I also added some random bone white markings on the armour, as well as the Northern Ghost insignia. These were all done as free hand which is not my strong suite, at least not for the finer details. One thing I noticed was that when I painted the larger areas, such as the shield border and the shoulder guards, was that when I used a larger brush and less paint for the base colour, it became like a stipple effect, which pretty much looks like flaked paint. This is something I will use for other projects. Other areas such as the white strips and such was painted with a normal small brush where I tried to emulate the effect of paint flaking. Once all this was done I used a sponge to add some paint chipping. I used two colours for this, black and brown as it adds some depth the damages with onsetting rust. This was then drybrushed with a metallic silver to get the effect of the under lying metal. The it was on to the rust. First layer is an orange ink that I apply along edges, recesses and around rivets. This can be faded into the green by watering it down giving it a more red tone. I also picked out edges on the flaked paint to show that is the underlying rust that makes it flake. Then I painted on some brown and orange paint to emphasize certain areans where I wanted the rust to be stringer. This was also used to paint on some streaking.


Now I just have all the detailing to do. Paint lenses, pistons, cables, hammer shafts etc. and clean up the face plates. Then it is assembly and finishing up. I am quite confident that I will get most of this done the coming weekend so I will be done in time.


söndag 8 oktober 2023

Dreadtober 3


After giving the model a bath and partial assembly I sprayed everything black and started laying in the base colours. The skeleton was painted my usual rusted metal starting from a black, brown and orange base and drybrushing copper and three white metals over it. It was then washed with earth shade. after this I went back and repainted some brown and oranges where I thought I would make the rust a bit brighter. Then it was time for another go with drybrushing. 


Once I was happy with the metals I painted in the green armour panels and gave them a brown ink coverage. This was followed by a three stage green drybrush followed with a watered down ink coat. Once dry yet another three layers of green drybrush. Quite a few steps and a lot of pieces. And in between each drybrush I rinsed each piece under running water to get all the drybrushing dust off (this prevents iceing in my experience).


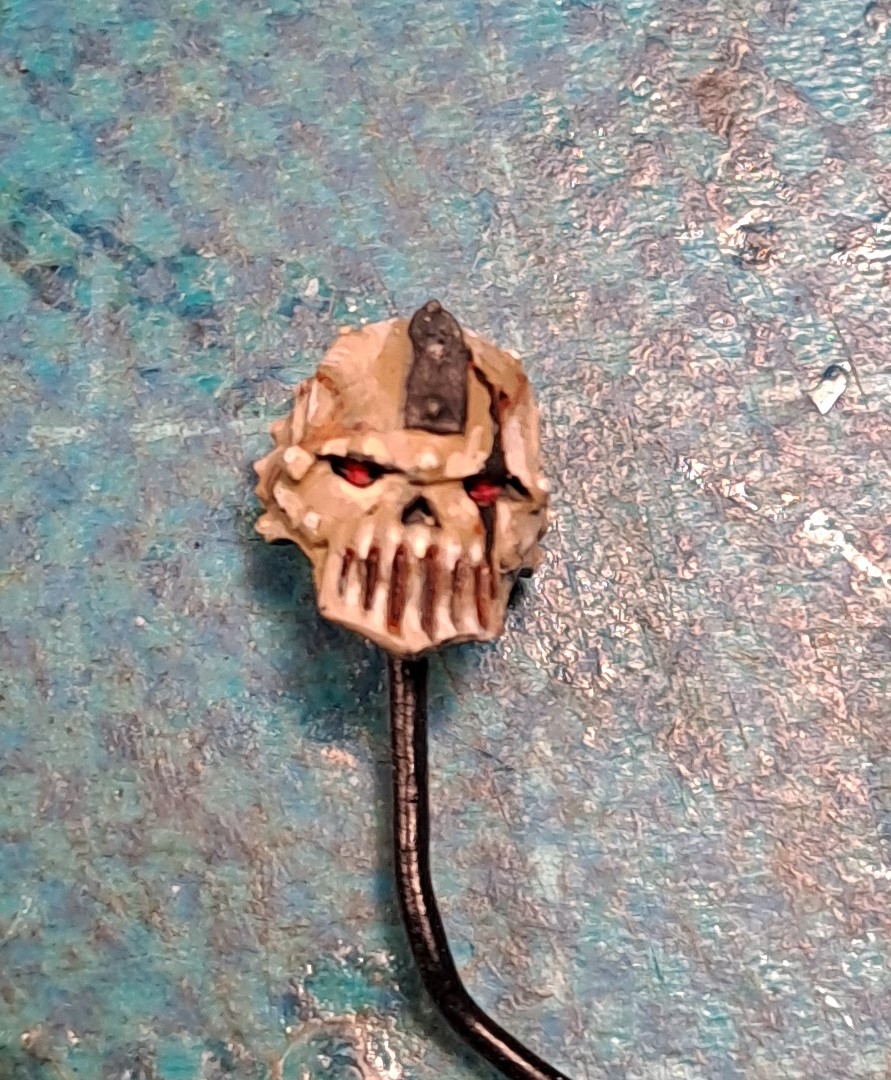
The face shields where painted in the same way as I have done on my titans and knights, a "painted" skull. Getting to the eyes were not easy, and I am not sure how much of these will be visible.


I also did the bases. These where not anything as advanced as the models but turned out ok. The concreete slabs where base painted grey and inked with three inks, then drybrushed four shades of grey. The earth was just painted a light brown, washed with earth shade and then drybrushed with sand and bone colours. These were finished of with some PVA glue and IRL sand.

All and all a productive first week. Next week will not see as much progress due to work, but I am confident that I will finish these before the end of the month. What is left now is to paint in some chevrons and other markings on the shoulders and shields. Then it is time for weathering with some sponge chipping. Once that is done it is just to go over everything and add the details and final assembly.

P:S.

I was asked if I could proved some scale shoots, so here we go. Domitar and mechanicum robot and some primaris and old-old-metal marines.


onsdag 4 oktober 2023

Dreadtober 2, the build


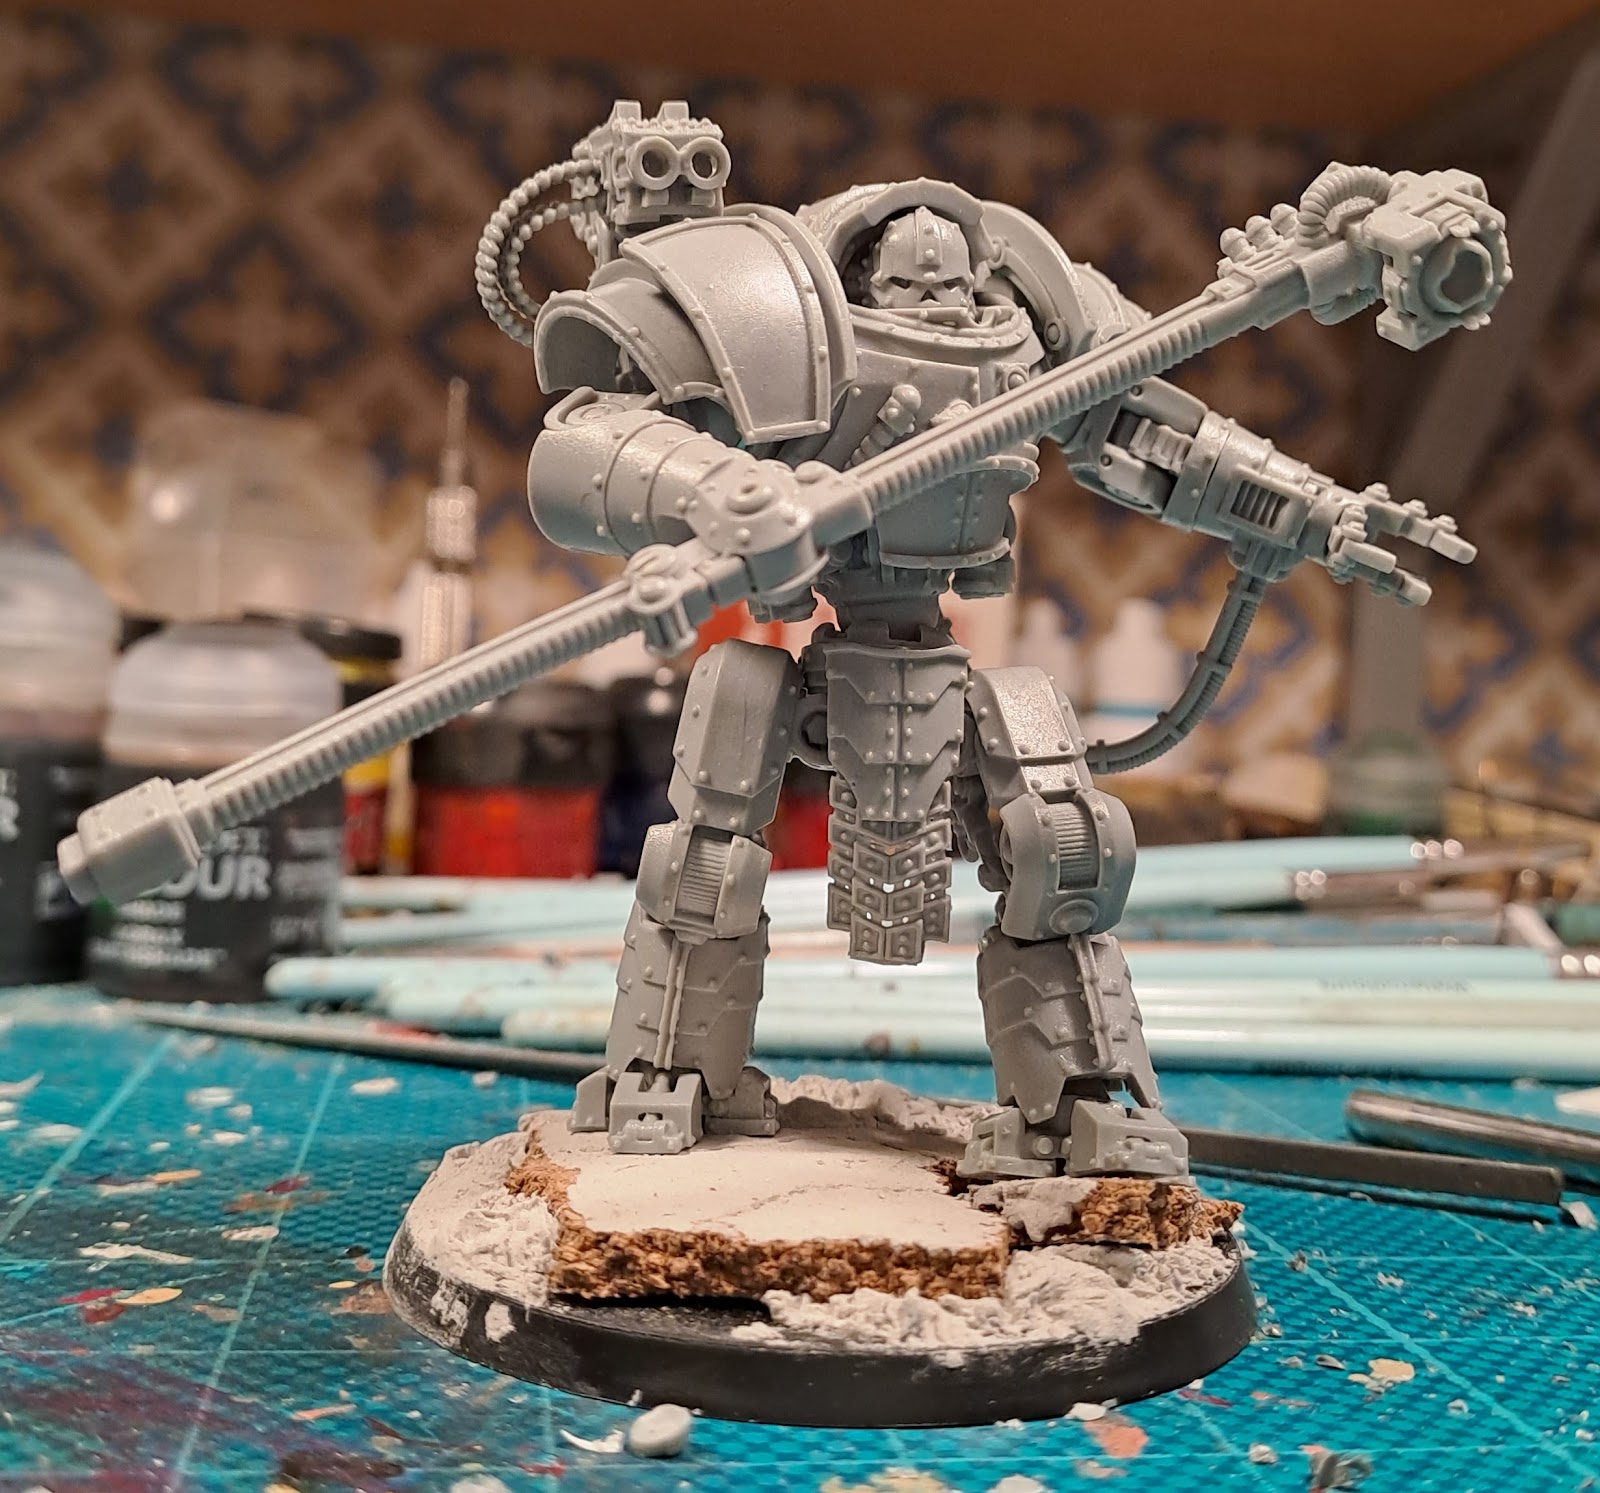
I am ploughing along with my Iron Circle Domitars. After washing all the parts I started by taking the legs of from the gates and cleaned them up. Om set had a bit more casting errors than the other so I am wondering if they are from different moulds or different ages.


Once cleaned up I though I it would be easy to assemble them in some dynamic way on the bases, as most of the FW kits, but then I realized that the legs are basically mono pose. Even if they come in eleven pieces you can basically only assemble them in one way. The upper body and arms has some more flexibility and makes it possible to vary the models enough for them to not look to similar. My problem was however that I already made the bases and wanted the legs to conform to this. One of the major things was that the surfaces for the model to stand on was made to be a left and right leg forward setup. And one of them also had different angels of the surfaces for the left and right foot.


As the legs are made to be left foot forward only I had to cut the hipp connector of from the right led and re angle it to get the thigh a bit more forward. I did not manage to make a full right leg forward pose, it became a more of parallell legs in a standing pose. Could have been better but it is different enough and I got it to fit on the base in a nice way.


Once the legs got sorted It was on to setting up the arms in a suitable way. I decided to make on of them hide behind the shield with a raised hammer and the other in a more open pose with the hammer across the chest. This will show the model in two different was focusing on different parts of the sculpt. This also menat that the heads will be pointing  to the side in different directions. 


To match the directions of the heads I mounted the bolt cannons so that the also point where the head is looking. This of course meant that bending the ammo feeds became a bit tricky as they are not really long enough for swivelling the gun in a proper way.


Compared to the ammo belts the power cables for the shiels was easy, even if they are a bitt thicker and needs a bit more care with the heating not to snap them. I might need to do some fine adjustment of these once the model is painted and I have fixed the arms into their final position.


I am leaving the models in quite a few bits for painting. each will be broken down into the base, the legs, upper body, hammer arm, shield arm, shield, neck shield, left shoulder guard, right shoulder guard, right shoulder mini shield and the face plate.

Next up is paint...   

söndag 1 oktober 2023

Dreadtober 01


It is that time of year again, Dreadtober. This time around, I thought I would get some Iron Circle Domitar-Ferrum class battle-automata done. I bought these several year ago (just realized how expensive they are now) as the body guards for my forge lord, but I never got around to actually doing them. I thing the reason I stalled on these was because I stalled out on the build of the forge lord. But if I get these done, then perhaps I can finish the Lord as well.


As these are Forge World models they first needed a bath, to make sure the release agent is gone. So I dropped them in a bucket of hot water and washing up liquid over the night. Then I went over each piece with a toothbrush and scrub them clean. To make sure I did not leave any residue of agent or washing up liquid I rinsed them with more hot water using a sieve. Now they are drying over night so that I can get them of the gates and start cleaning things up tomorrow.


While the pieces were laid out to dry I decided to do some quick bases so that I can fit the pose of the Domitars to the base. I will have to go over them and sand some of the ridges down but generally I am quite happy with how they turned out.


tisdag 5 september 2023

Angron the not so red


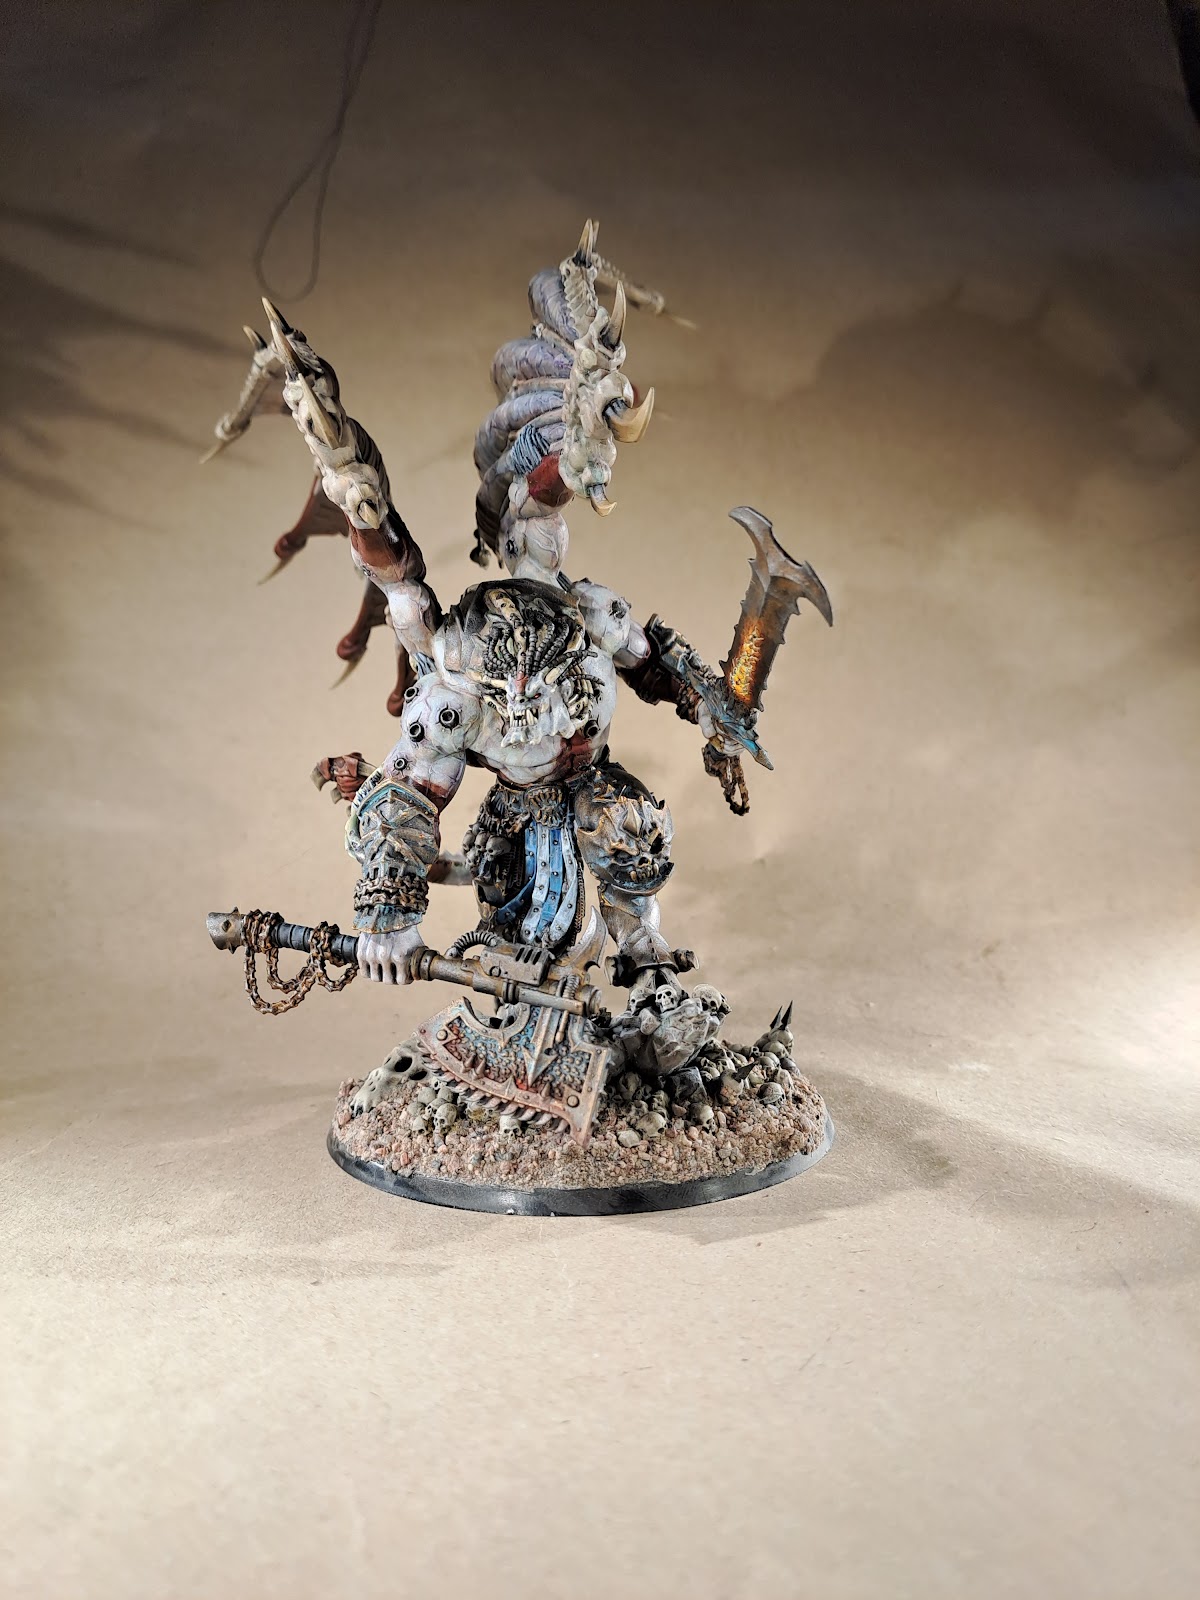
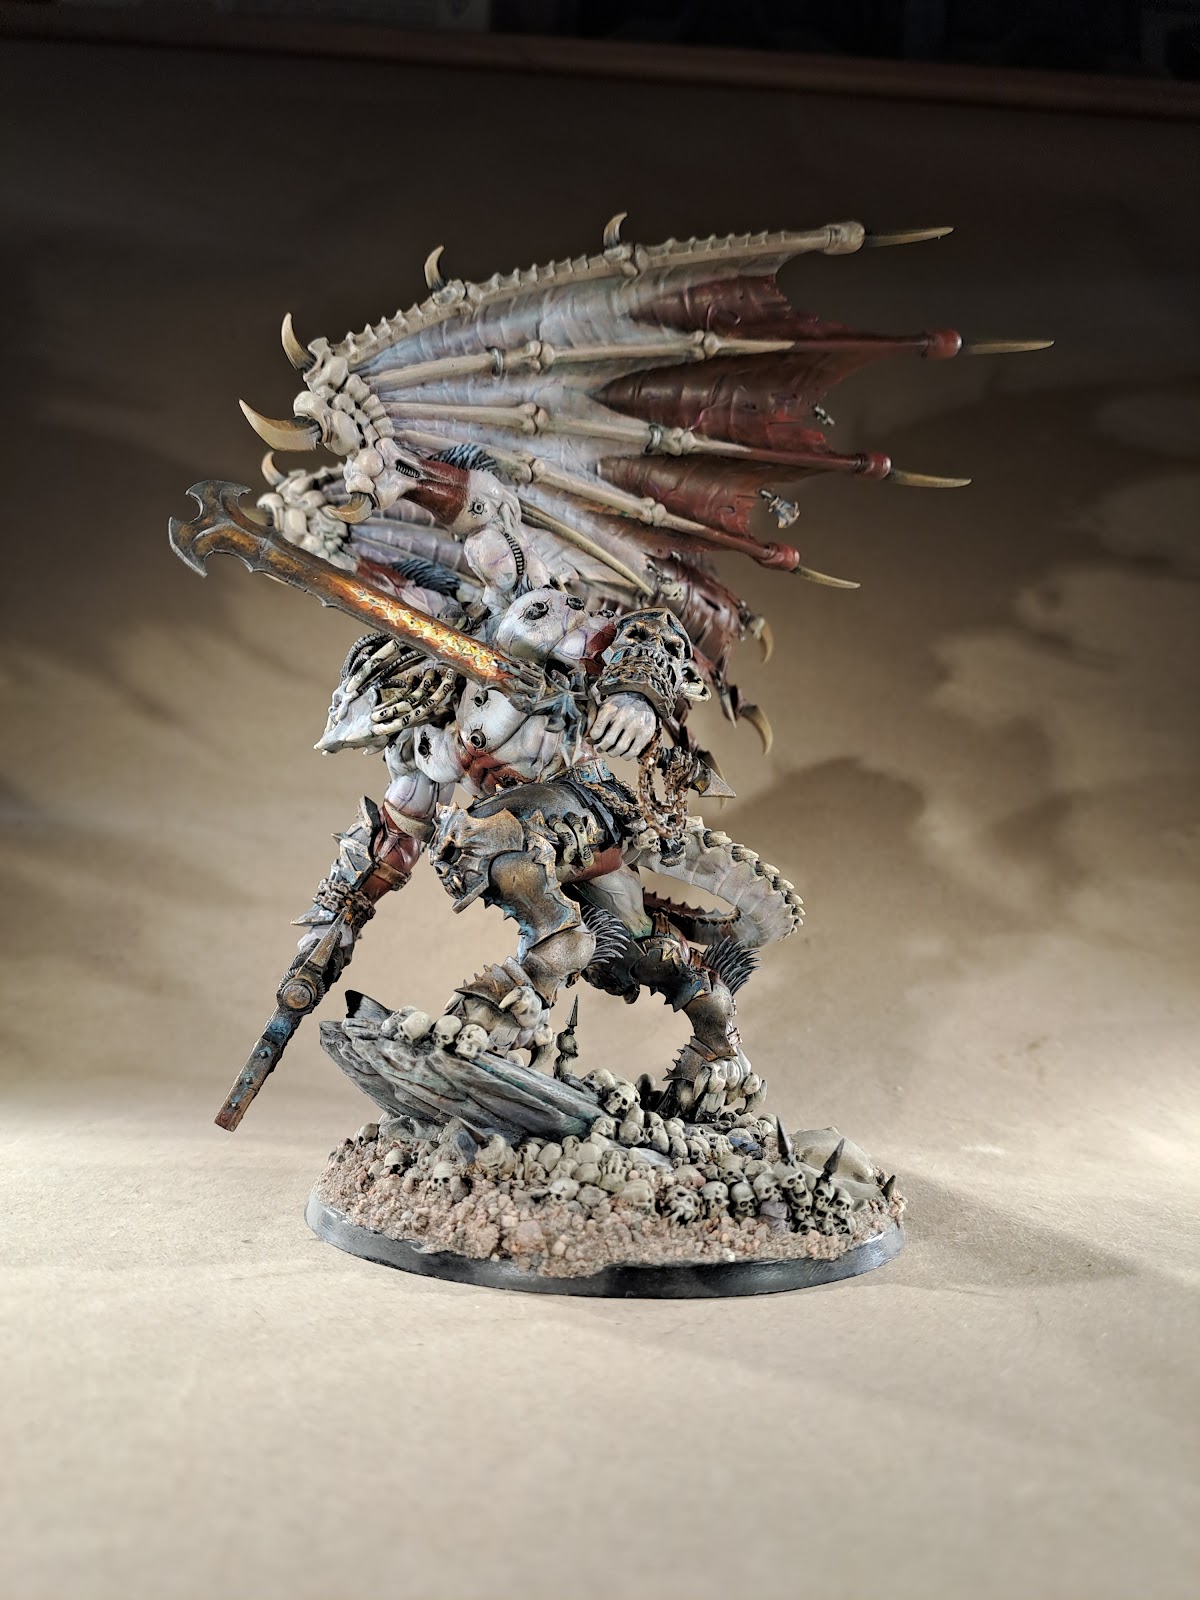
So when I said I did not really do that much over summer I did not mention the long running side project I actually did do as ut was a very on and off thing over several month. Once the model was released I acquired Angron. I love the model. It really has a menacing look, with the slightly hunched over pose. First I was a bit disappointed that he did not dual wield axes, but I eventually got over it and now I sort of like the hooked sword he is sporting. I still think it would have been nice to include the option of another axe though.


When it came to choosing a pint scheme I went for a slightly non conventional look. Normally, as on the box art, Angron is portrayed as a red demon. But I thought it was to close to the blood thirster look and wanted him to stand out. As he is originally of "human" stock I decided to give him a pale skin, and give him some red block tattoos instead of totally red skin. I also decided to give the skin an unhealthy pallor with visible blue red veins. I am really happy with how it turned out and it is really sad to cover it all up with the armour. I also really like the ports for the armour in the mussels. It is almost that I would have liked to have two models. Sadly it is not possible to have the chest and shoulder armour removable as the cables from the back tie into the chest piece.


I made the armour itself in bronze with a heavy degree of Verdigris, which had the unplanned effect of giving him a blueish tone, which ties in nicely with the white and blue staps at the loin and shoulder. Very much a homage to the world eater colour scheme. The axe and the sword were made to look old and worn with rust and Verdigris. 

The scenic base of the model was raised from the oval base by adding two layers of clip of from the sprues. The void was filled with some carpentry filler and I added a tonne of extras skulls from the skull box.

It was a nice build but I do not understand how anyone manages to paint it fully built. It is very dificult to handel once assembled. And once again I am reminded of how much I do not like to paint the wings of these demon models.

Lets see what the next model will be. It is almost October so I have to figure out what I will do for Dreadtober. 

söndag 27 augusti 2023

Ghost walk


Once again it has been some time since my last update. It was not intentional but it just happened as the summer vacation did not turn out as I had planed it. Idea was to work in the garden during days and on Opus in the evenings. But the weather gods did not agree, so instead of working in the garden (due to rain) I got stuck in the lounge set under awning reading Gaunt's Ghosts (all the omnibuses). That meant I have not much to show in terms of hobby results.

I did however manage a photo shoot with the ghosts before the weather turned bad. I needed to add a holding pin in the waist of Varangian, to stop any similar mishaps that I had with Fenrir, and to get to Varangian I needed to remove the rest of the titans from the display. And as I were working on paving the driveway and had a nice pile of gravel that would make for a nice backdrop I decided to make a thing of it. It really is difficult to get all the models in one shot without getting the house or any other thing in the shot as well.

I also took some pictures of the Northern Knights as well...


Varangian


Fenrir


Joluns Modh


Ylgjar Ergir


Uthola


King in the north


The Ronin


The Quarterbacks


The Younglings


We Walk