torsdag 30 november 2023

Sergeants of the Crusader


This week I had some time of from work so I finished of the sergeants. There was not that much to be done. Painted the heads a slightly darker bone than the carapace. Added lenses to the eyes etc. In the end I decided to go for the dual wield anyway... I can always rearm them be swapping weapons. In the end I am happy with the painting, but the ideas I had for posing was slightly better in my head than what I managed to get in to the build. I specially think I should have taken the extra time and effort to make the Wardog with the Gatlings crunch down more on top of the building. In its upright walking pose (original leg pose) it looks like it is on stilts. That or I should have used another building with a more solid look. For the jumping one I think it might have been better to have the foot pointed downwards instead of forwards with the extreme forward position of the leg. This might have worked better with a lower elevation of the leg. So for the remaining Northern Knight's Ghost pattern armigers I will be a bit more restrictive with the poses and make sure to take the time to get it right if I try something fancy again. 

Sergeant 1


Sergeant 2


Now I just have to finish the Crusader himself. I have most of the things built so I am thinking of start the painting while I finish the weapon builds.

söndag 26 november 2023

The crusader bases


This week was spent finish up the two War dogs and the bases for the trio. As the knights are mostly rusted iron and bone I decided to stay away for these colours as much as possible for the bases so that they do not meld with the Knights. Instead I went for a blue-grey chipped paint with some rust. This was a perfect opportunity to try out some new colour schemes and techniques. 


All three bases are quite distinct in their composition so I used the same palette to tie them together. The blue was done with a light blue gey washed with a watered down darker blue grey. Once dry I drybrused things up to white over a four different shades of grey. Then it was sponge shipping and hand painted rust (i.e brown and orange). To get some differentiation I also added some of the rusted metals that I used on the Knights were appropriate, such as the tracks, antennas and doors. Once done I added my usual gravel to the bases... so they will at least be similar to my other models in that respect. I will have to go back and add some more gravel to some strategic points later on as  I think some areas are to smooth. Overall I think I spent more time painting the bases than the War dogs... but it was nice. 


As I do not play much these days I do not really have a use for scenery but these bases gave me some opportunity to try some out. I do have some other old models (from the time when I though bases were just a distraction from the model) that are just sitting on bare plastic bases, so I might start a new project to base these, also with scenic bases.

Next step will be to mount the War dogs on the bases and decide if I am going dual wield of if I will give both one of each weapon. The Crusader will also be dual wielding Gatlings (with shoulder Gatlings) so I do not know which way symmetry will be best.

söndag 19 november 2023

The Crusader and his sergeants


This week I took a break from the Opus and its flight wing to get some painting done on the Crusader and his sergeants. This is sort of a new-ish project, that has been hanging around for a year or so but it is only recently that spent some time on it and finished the build so that its ready for paint. Last Christmas I got Be-Lakor form my wife, but I already had bought the model (wifi forgot as I did show it to her) but not built it, so I exchanged the duplicate for a Knight Desecrator and got me some War dogs to go with as escorts.


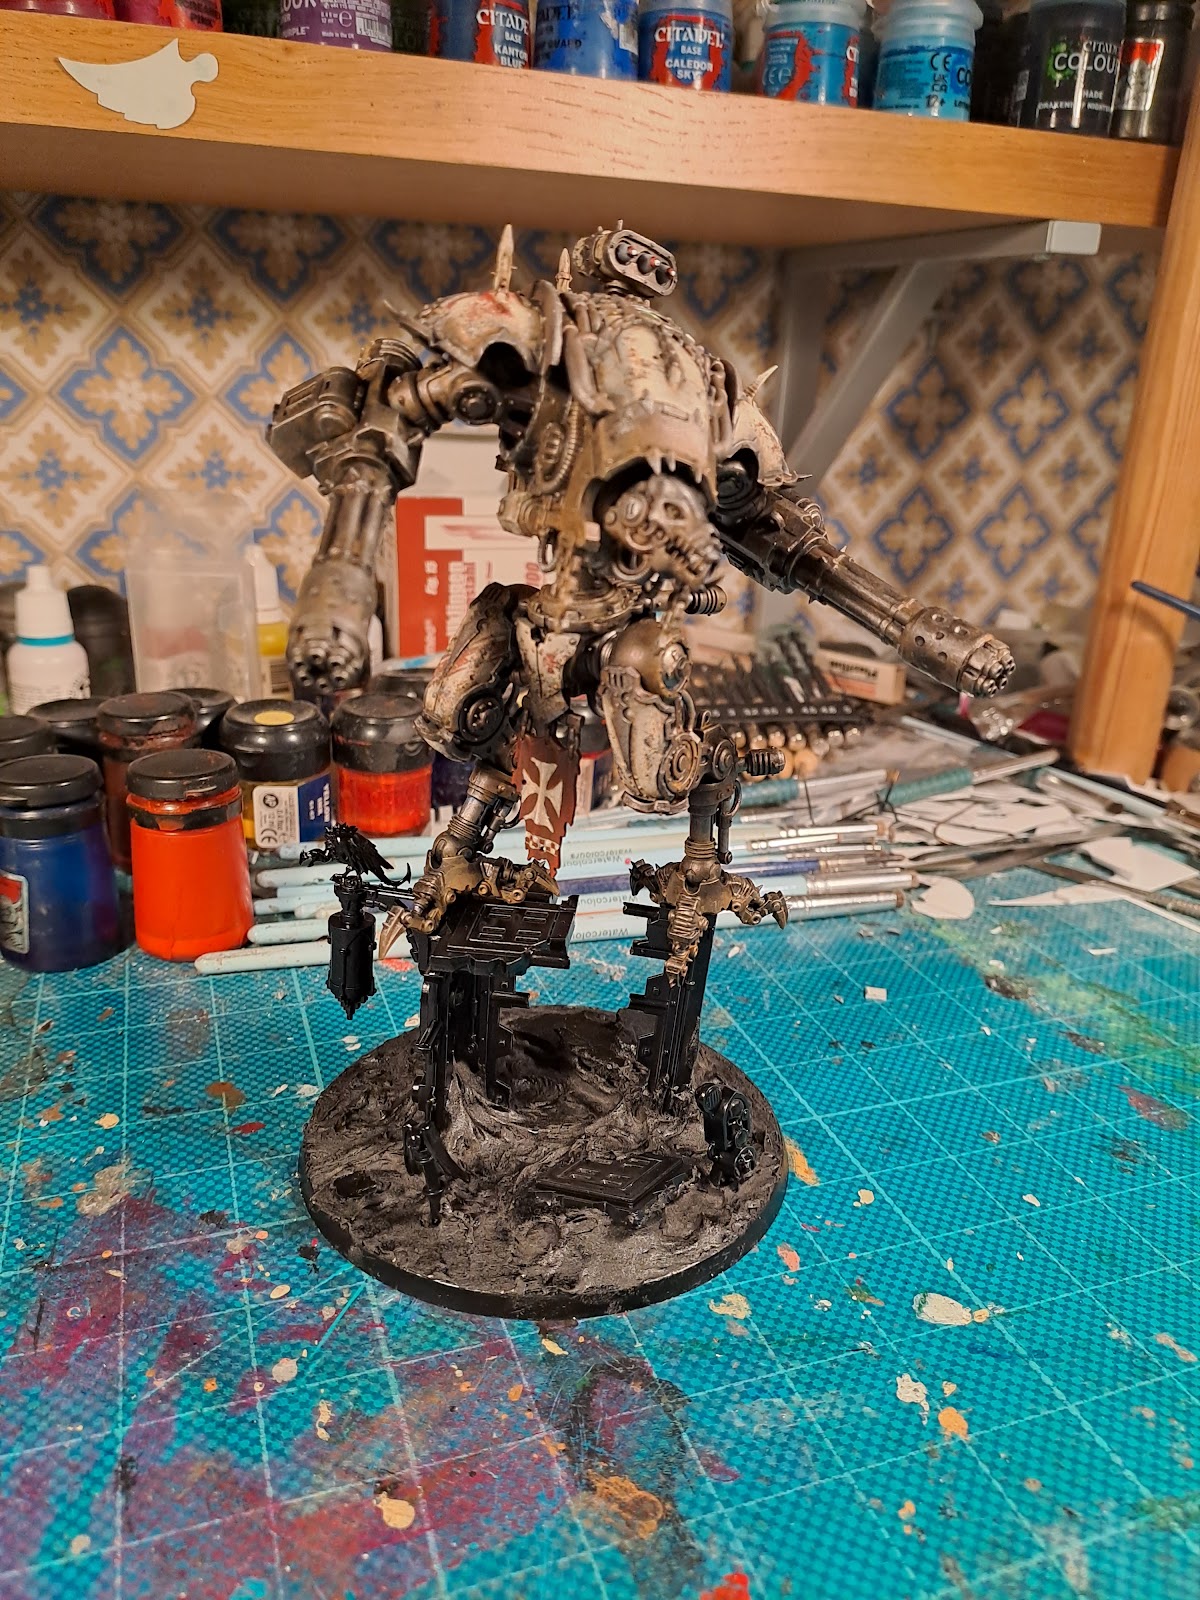
Once in a while I come across some nice paint schemes as I am doing steps for other models. At some point I was doing my rusted metal and a bone white armour panel that I thought look like a nice combo (probably for a Northern Knight before adding the blue chevrons, might have been Entropy). As the Desecrator and War dogs are quite different models from the Knights I used for my Norther Knights I decided to paint them up in a different scheme and decided to try the bone white armour with a black/rusted trim. To give it some colour I decided to go for a brown red detailing on the armour, and that made me think of the Knights Templar, and thus the Crusader and his Sergeants project were borne.


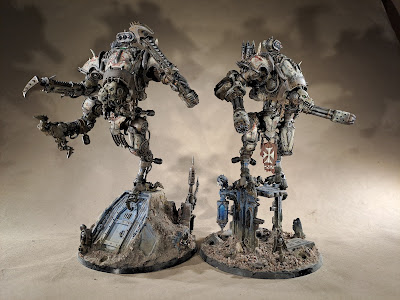
As they will be freestanding models, I decided that I did not need to adhere to any previous standards for modelling nor game rules for that matter. That meant I could go nuts with the bases and make them more extreme than what I normally do. It also meant that I did not need to think to much about legality of weapons etc. As I have a thing for dual wielding I got this idea of a War dog leaping of a building with to chain glaives. That would leave two gatling guns for the other War dog. To get them on the same level the second dog would be crouching on top of a ruin for some better line of sight. Once I got the two bases build I needed to fit the legs to the supports and for the leaping dog it meant cutting things up and re-assemble them in a more leaping pose. For the second dog it turned out that the building was a bit to narrow to be able to do a crouching pose (could probably have done it but it would have required a lot of cutting and building custom parts as the legs are not meant to do this) so instead it is more standing upright. Not really what I was going for but I guess it will do.


I am not really sure about the dual wield thing though, it does not look as good as it did in my head, but I guess that I can always swap the weapons so that they have one of each instead. We will see when we get to final assembly.

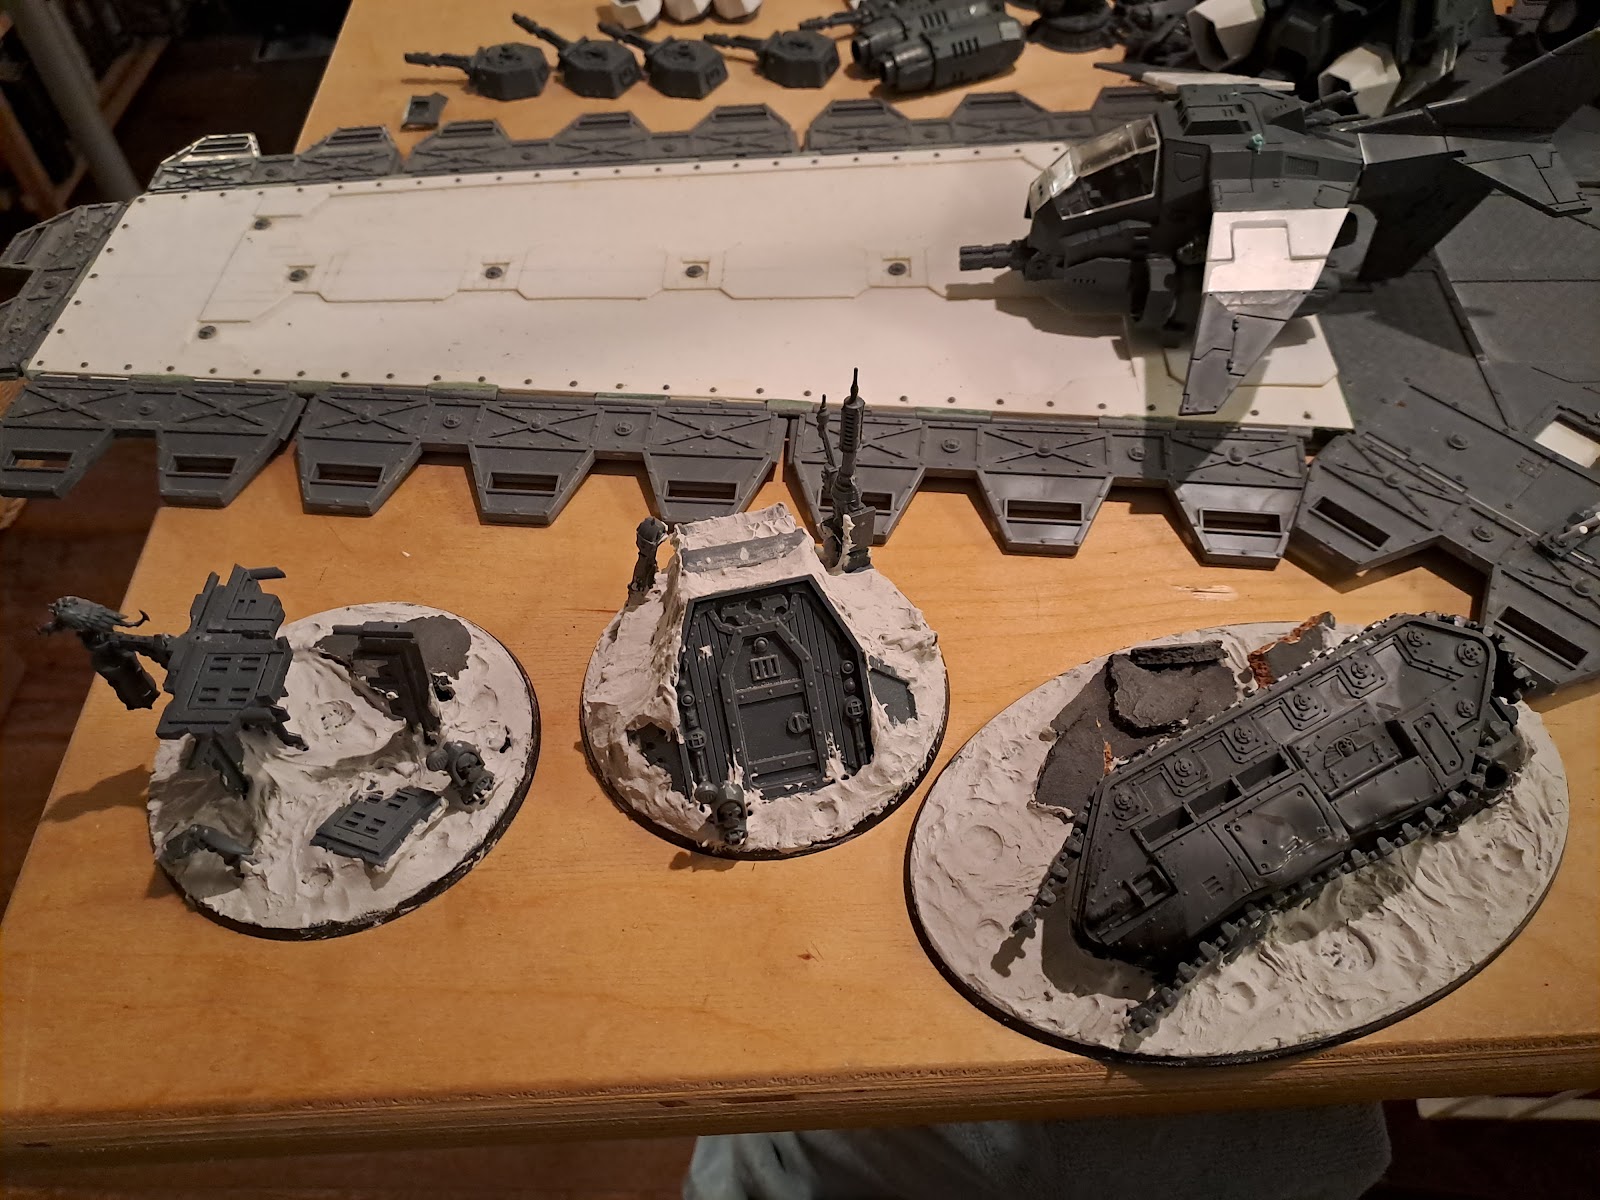
Now I need to finish the weapons and get the bases done. Then it is on to the Desecrator (which still needs some build time) to tie it all together.

tisdag 14 november 2023

Flight wing update


This week has mainly been about tweaking the build for the fighter bomber. Basically it looks more or less the same as most of the changes were structural. I added some extra jet nozzles to the bottom and rear of the craft to give the body some more bulk. This meant that I needed to move the main engine pods slightly outward. I also added some weapon rails to the wings so that I can switch the weapon load (right now only a assault cannon is test mounted). At the front I went for the storm cannon from the hawk build. I think it fits but looks different enough from the assault cannon used on the storm talon. 

I also continued to work on the intakes for the fighter, as well as started on the avenger cannon.


As I have been on a building spree these last few week I also decided that I needed something to paint so I finished up the build of two wardogs and their bases. I will be back with some more updates on these later.


söndag 5 november 2023

Opus flight wing, fighter bomber


This week the Omnissiah has been with me and thing has gotten taken care of. I have finally broken through some of the blocks I have had on the build of the Opus Magna and its flight wing. Already in my last post I showed that I solved the problem of the folding wings for the fighter. I have now added the tail section, using the tail plane with the angel from the Nephilim kit and the stabilators from the storm talon. I think it worked out fine. I also started on the intake cowlings. They are not completely done yet as I need to add the lower part. But as they are curving in beneath the intake I needed to get the top part fitted before doing this. Once that is done I will build the nose. In my first take I made it as long as dimensions (max length to fit in the elevators) allow but I think that in the end I will cut it back a bit to match the intakes.


This weeks main build has however been what will be the fighter bomber. I have had the main shell built (storm talon/hawk with Nephilim tail) for some time but had not really sorted the location of the engines. I wanted to leave the wings as free as possible to be able to mount as much ordinance as possible without it colliding with the engine pods. This meant that neither the talon nor the hawk mountings were feasible (this would also make them to wide for the elevator). The storm talon is however a great kit as it contains an extra sprue to build the storm hawk. This leaves a great deal of extra parts to play around with. First I built the storm hawk engine pods and tried them out in a variety of positions but could not find any that looked good, so I left it for some time. Instead I built the wings, based on the storm hawk wings with the cowling cut of. I used the Nephilim stabilisers as wing tips and added a mid section that also incorporated the hinges for the wing folding. I also fixed the tail section up with the Nephilim tail plane and the storm talon wings as stabilisers. I was really happy with the profile. The I vent back to the problem of the engines. In the storm hawk build there are some small engines that can be mounted beneath the model that sort of looks ok, but they are a bit small and the intakes are not well defined on the model. i guess that is the two side grills on the front. So in the end I decided to bite the bullet and make room for the larger engine pods in the same position, i.e. tucked in under the main body. This really was a point of no return moment as there is no coming back after cutting most of the underside away.


Once I had made room for the engines I realised that they are to long and I cant bring them enough forward to compensate. So in the end I had to cut the pods down with about 8 mm, which made them just the right length. It also gave me some pieces that I can use for the intake cowlings. All in all I am stoked about how it turned out. Now I just need to finalize some of the details.

As I am building four of each of these aircraft I can not build them all at the same time in case I do something very stupid. So I am actually building one prototype of each model first, that I call a pre production model (will probably have some markings once painted to represent this). Once I am happy with the modifications I go back and do the same modifications to the reimaging three models bringing them up to the same point. Then I go back to the preproduction again and keep adding things until I think they are ready.

I am really happy with how the flight deck is starting to fill up. Once these are done I have another four storm talons to build and a Valkyrie. With all of them on deck at the same time is will be full.