So, it has been some time since the latest update. I have been splitting my time between painting the interior of one of the war hounds and assembling the legs for both of them. The idea was to have one upper body assembled so that i could see that it balances the right way before committing to gluing too much. I started with gluing the legs into the position that I thought they should have, one titan will be walking/running and one will be at a low, wide legged, braced position. The problem with the assembly and gluing of the leg parts is that the joint fit is quite poor. So it leaves approximately 1 mm of side way mismatch. To correct for this the joint has to be pushed to one side which gives the model a slightly of center look. If the joint is centered it will not have any support from the large side areas being glued to each other. If one use glue with a filling capacity this might work out any way. But since this is my first try at a FW-titan I am not taking chances. So I decided to first glue the parts on all contact areas, center the joints for a nice look and then pin it through the joint. I bought some two component epoxy glue that will make a super strong bond and also works as a filler, however it has a curing time of 24 h, and parts are adjustable up to 12 h. This is kind of a problem as things might get out of alignment while it is drying and once it sets I don’t think that I can remove it again without damaging the parts themselves. Later on I decided to complement this with a fast curing, but not as strong, epoxy. In this way I could use the slow curing glue on most of the area and only use the fast curing one to hold the pieces in place until the stronger clue hade cured.


After gluing and pinning the legs it was time to start with the feet. The instructions say that you should start with the feet but as I think is the wrong way around as the feet has to adapt to the leg positions and not the other way around. So using blue tack I attached the legs to the hips and to the feet and tried to find a good looking pose, once I had a fairly good idea of how it should look I started out with the middle front toe and the back toe to so that I could get to the joints for pinning. Once again I dry fitted the legs to the feet so to see that the pose was right. Then I a glued on the outer toes and pinned them. At this point I had not started to use the mix of glues and one of the toes slipped so that the attachment to the foot part was not even. This was the reason to start using a fixing glue to hold the parts in place while the strong stuff cured. I can cower this up with green stuff to some degree. I also made a mistake when attaching the parts that holds the toes to the back foot of the running pose. In this pose the foot is raised up from the ground and only the front toes are in contact with the surface. My first attempt started with attaching the holders for the toes to the foot. In a flat normal position these are all mounted in the same way, parallel to the surface that the foot is standing on. However when the foot is lifted and tilted forward the outer toe mounts should rotate so the toes are still in full contact with the surface. This is due to the angling of the toes. This I discovered after the holders ha dried and it was no longer possible to remove them. This would have meant that I Would have had to change the positioning of the titan which would not have been easy as I had already glued the legs together for a running pose. So in this case it was good that I had another set of feet lying around (for the other titan) so that I could make a new attempt at the running pose. One thing that I came across in a comment on another WIP blog (don’t remember which one) was that running is done by setting one foot in front of the other to make the run smother. So I decided to use this in the running pose which meant that it has to have the feet in a line but still be able to balance (which is not a real problem in reality as the forward momentum helps to keep you up). To solve this problem I tilted the feet outward while leaning the legs outward so that the hip joint ball is on top of the foot joint. The legs are actually able to balance individually without support, even the one that is up on its toes. After getting the leg position right, using the two glue trick I decide to fix the hip joint. So I attached the legs to the hip balls with blue tack and glued the balls into the hip. At this point I was careful to make sure that the pistons regulating the hip would be able to fit at the chosen position. For the spread stance this is very important as the hip joints almost touch the pelvis. I also used a spirit level to make sure that the pelvis was in a more or less horizontal position. On the running stance I tilted the pelvis a little towards the front leg side so that the torso would be leaning towards this side rather than the side of the back foot.

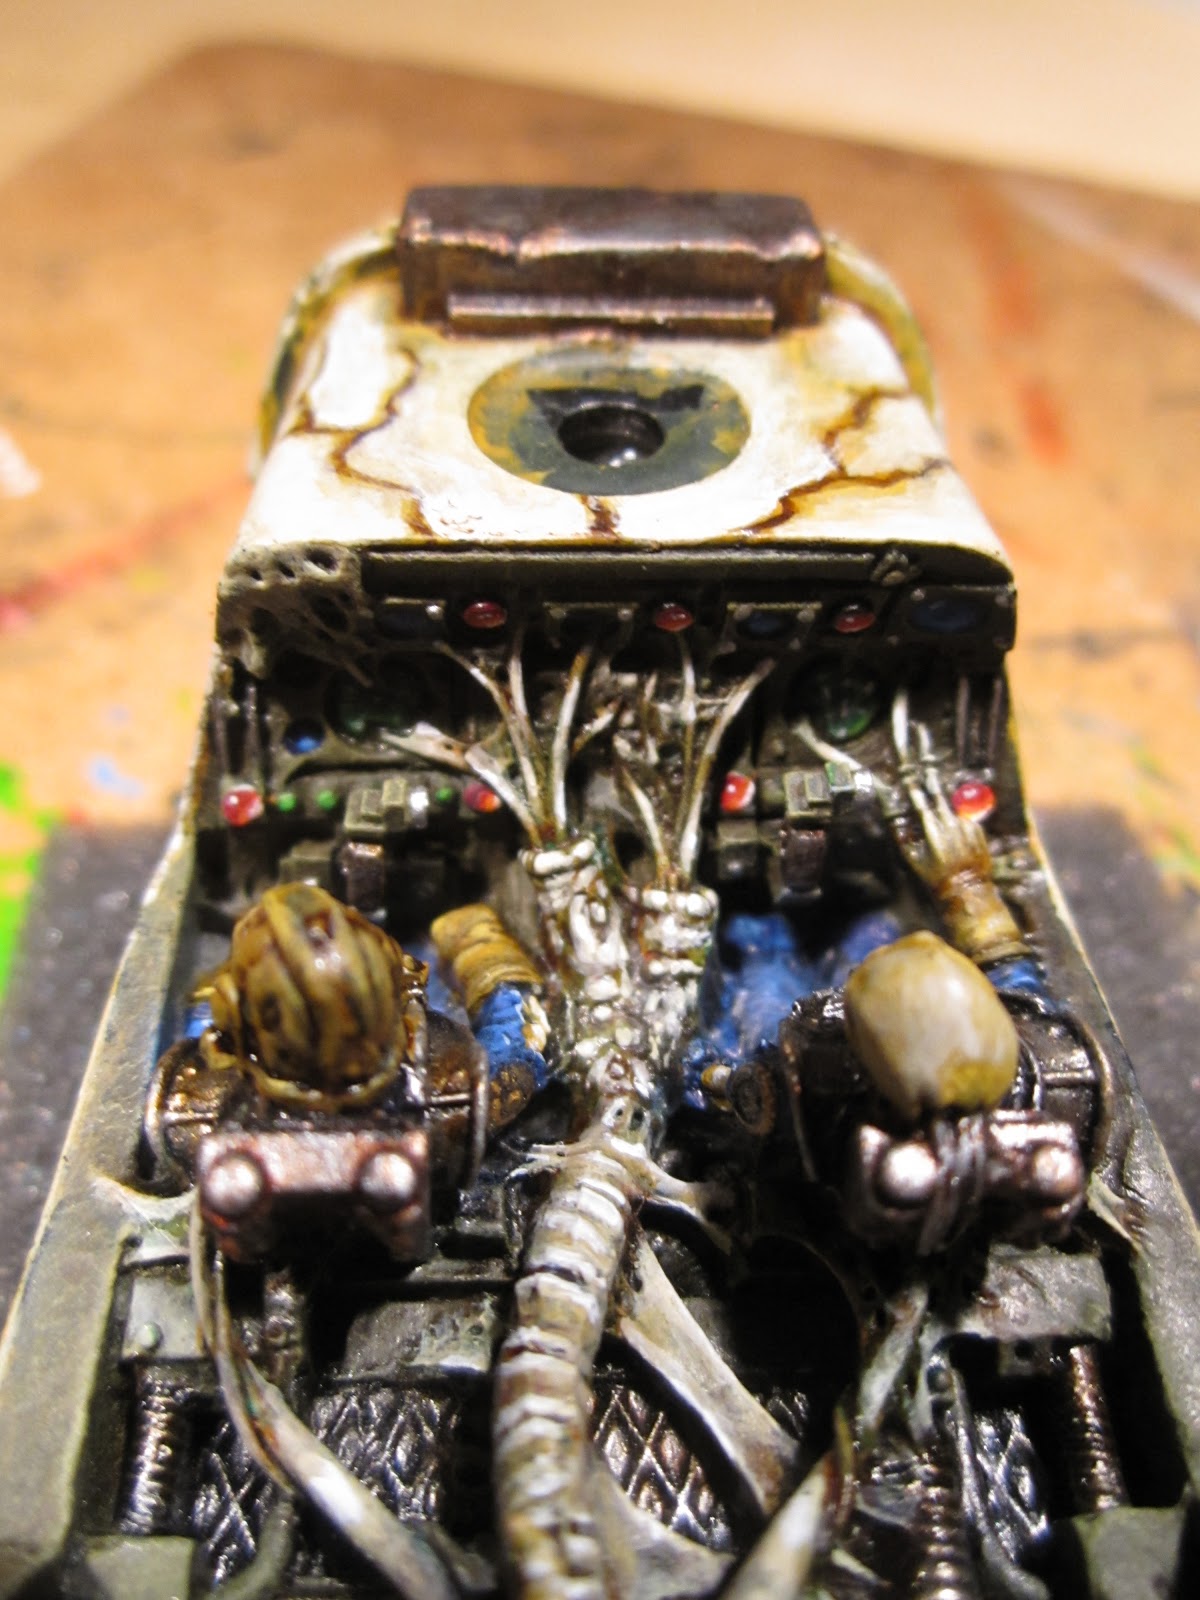
 While gluing and pinning the feet and legs I started work on the interior. I kept the same color scheme that I used in the head. The walls where painted in the same green that I will use on the outside, then al the organic parts were given a green brownish tone. The tech priest and weapon servitors got a deep red color while the rest of the crew as blue overalls. I also tested the idea that I new color scheme is growing over the old in the same way that the chaos iconography is growing over the armor. After all, looking at the crew I don’t imagine that they would crawl out side to repaint the titan. The idea is to paint a red color around the chaos iconography and let it cover the old imperial color scheme as the markings grow larger. I will also make some more imperial iconography that is being destroyed and covered by the mutations. Once the interior of the torso is painted I will glue it together, pinning as I go. Then we will se if I start on the other titans interior before I start with the out sides. At some point I will also start cleaning up the Reaver titan and assemble the legs for it. I still have not figured out what pose it will have, and if this is possible to achieve. I am looking for something, more dynamic than just standing with legs apart, looking straight ahead. Well I have to think about that some more.
/M