söndag 29 januari 2017

Support


Hi there. Today I thought I would talk a little about support. And that is the support from family for the hobby. Not everyone is blessed with an understanding significant other, and it might be hard to explain why we spend so much money and time on painting, and perhaps playing, with these small, and not so small figures. During the holidays my parents visited us and for some reason my figures, and their prominent placement in the house came up as a topic. They have always know about my painting hobby. Since I was a small kid I have always built models (mostly planes, ships and cars) and from my mid teens, 40k models. It has been a way to relax and clear my mind when things were tough and other things were pressing on my mind. Anyway, during the conversation the question was raised whether or not it was time to put a way the models (or sell them). Then I came to think about how much the support from my wife for the hobby means to me. She is proud of the things I do, and loves to have them on display in our house, as any other piece of art. In fact, she has been supporting my hobby ever since the first time we met may years ago, even before she knew anything about the emperor, space marines or the imperium. As one of the first presents she bought me for my birthday was a box of Tzeentch space marines. She had walked into the local hobby store and picked out some models that she thought looked cool, not knowing whether they fit any of the armies I was painting, she just knew I enjoyed painting and hence she wanted to give me something to paint. During the years there have been many more models (and 40k books) as presents for birthdays and Christmas. And even if I have loads of other models, the ones I have gotten from her always stand out for me, as they represent her support for what I love to do.

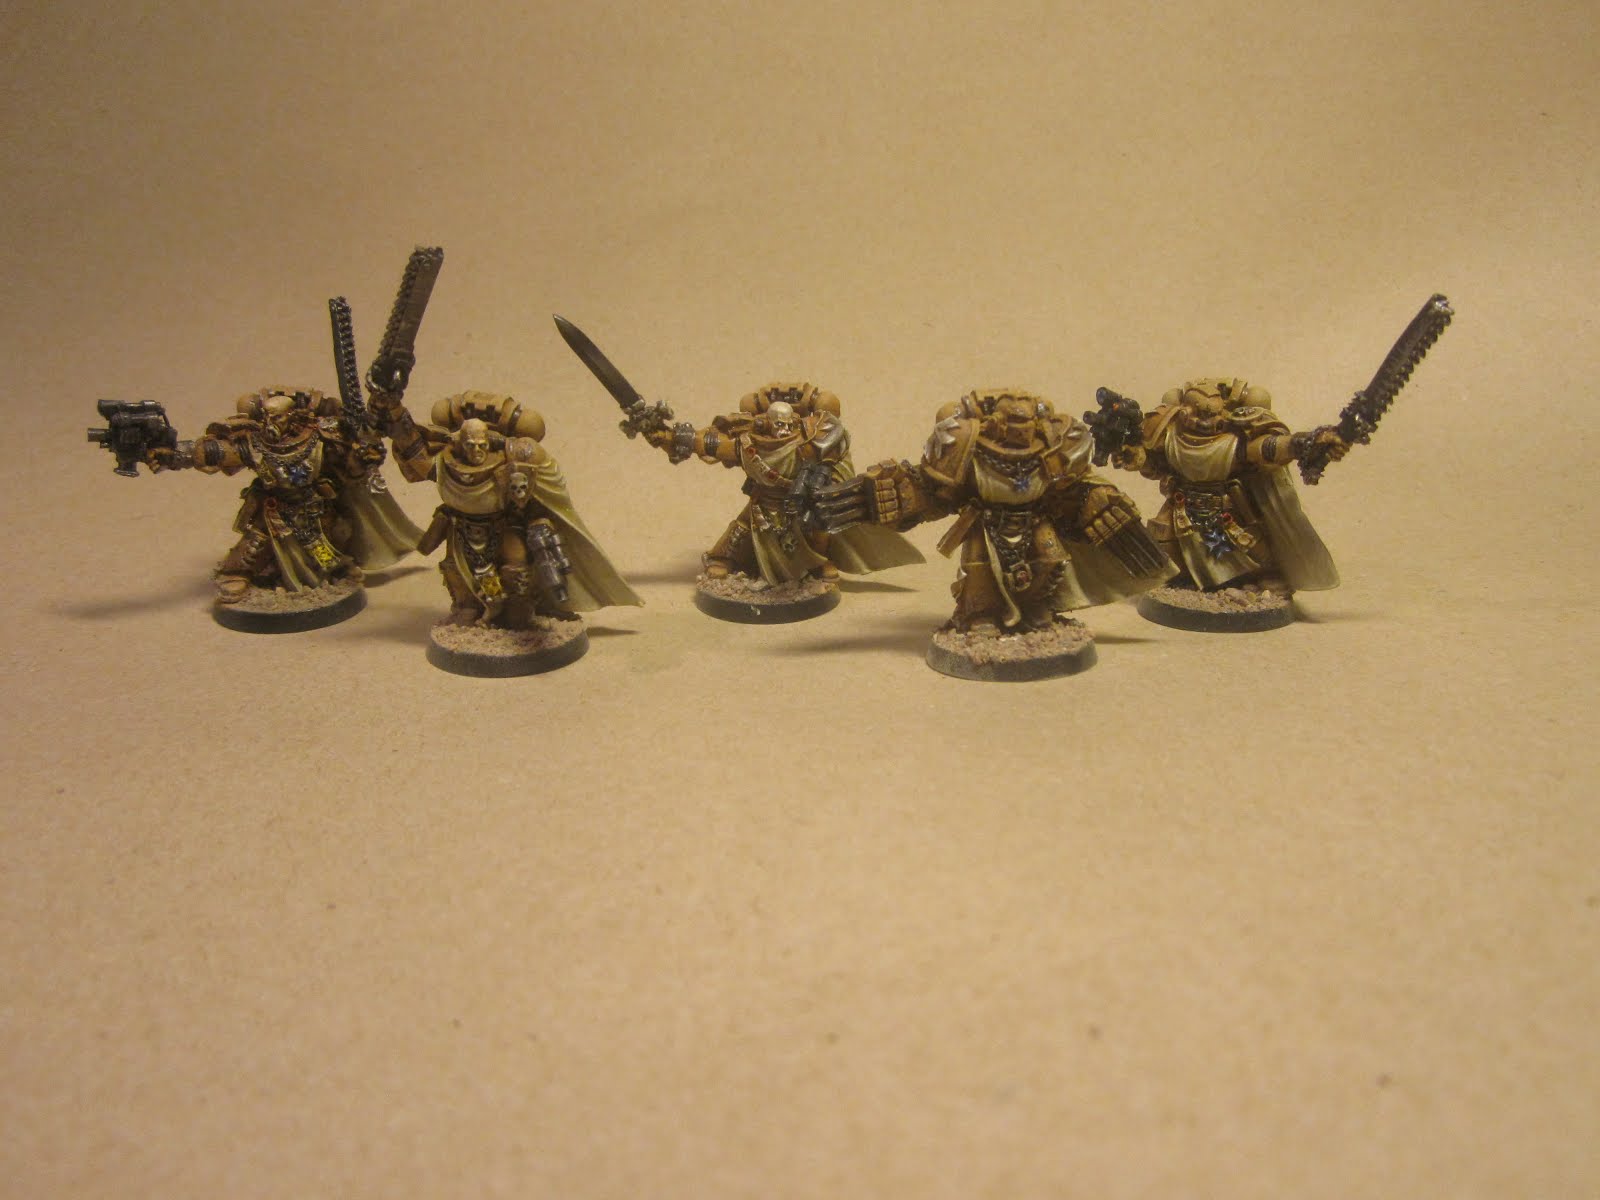
So I pulled out all the models I received and took some pictures of them. They have all (or nearly) already been shown on this blog so I am afraid there is nothing really new here, but they are special to me.


söndag 15 januari 2017

Varangian inside WIP


Not much hobbying since I finished Magnus. I have mostly been playing around wit green stuff on the internal panels of Varangian. It is work in progress and not the final detailing, but I just thought I would show what I am working on. I am adding some "chaos growths", both the standard version of ridged brass, that I have done for the knights, but I am also trying my hand on the more organic stuff seen on the inside of the warhound. I still have not really gotten it down right. I will add some more layers and see if it looks ok, otherwise I will have to strip it and restart.I have also made some progress on the base for the titan and I think it is turning out fine. I did however have a major failure with my squashed chimera, but more about that later.


måndag 9 januari 2017

Magnus The Red


Finished Magnus up this evening. Some minor touch ups left but essentially he is done, and I am pleased with the result. For the armor and tabard I tried something a bit different. I am not sure were I got it from but to my mind Zeentch is the multicolored ever changing god, and to represent this I wanted the colors in the armor and cloth the be white but with a rainbow shimmer, like pearl. This all sounds fine in theory, but how to get the effect using normal colors? This is something I have not done before but I am happy with the result. I started out with a base color, white metal, then I applied very thin watered down inks (these are the original inks from when I started painting) of purple, blue, green and  yellow in diagonal stripes across the different pieces. I did the same for the cloth but dry brushed on edge highlight colors instead. After this was applied I dry brushed layers of metal over them (not the cloth, here I used blue edge and white). In the first attempt I went a bit to far with the metal so even though you could see the color tones the were to subtle so I went back and re-enforced the colors a bit to  make them pop some more. Once I was satisfied with the base metal I applied the detailing and gold borders following my basic recipe. All the armor pieces were painted separately from the model so when I attached them I took a series of "dressing Magnus" pictures to show what the model could have looked like if only parts of the armor was attached.


fredag 6 januari 2017

Magnus the red, WIP; viewer discretion advised


This year I got "Magnus the red" as Christmas present from my wife (I have a very understanding wife). This is a stunning model and very fun to paint. As I am not doing a Tzeentgh army I felt that I could take my time and experiment a bit with the paint scheme. Since the model is so detailed, even beneath the armor I decided to paint the model in a "naked" state first and add the armor afterwards. This helps with the painting but also gives me the opportunity to take some photos  of the model painted and assembled with all the details that will later be hidden.

For the paint scheme I decided to stick mostly with the original as far as the main colors go. I painted the skin a deep red (but not the same as my blood thirstier) and dry brushed it up to yellow. This gave the model a red base but in moderate light it looks more like a red brown which is more believable as skin (even though he is a daemon). For the hands and feet I choose to bring in some more purple to represent the change from Magnus "natural" skin tone to the more Tzeentgh daemon colors. This also ties in with his mutated feet and big claw hand. I also did this for the hand holding the spear, but I am not sure that was the right decision as this hand is not mutated as the rest of the extremities.

For the wings I went with some more vibrant colors than the original, which I think ties in more with the Tzeentgh theme. Getting the blends and transitions were not easy with the dry brush (here an air brush might do a better job). These new injection molded things are very thin and hence flexible, which makes dry brushing hard as the surface constantly yields to the pressure of the brush and it becomes difficult go get an even coverage. To avoid frosting I rinsed the wings with water after each dry brushing session (usually, three to four colors in a field and max 20 min brush time). This mean that the wings had to be painted in multiple stages, i.e the four sides and two fields per side and two to three passes per field with rinsing in between.

The metal parts are given the standard treatment to make them look more weather beaten. For the runes on the blade, and also for the arm, I decided to give them a blue-ish glow and try to make it look like they were beneath the surface rather than on top of it. So after painting the runes I actually went over them again the the dry brush to add some original colors back to the edges of the cutouts.


For the base I decided to do something more advanced than I usually do, as this will be more of a display piece (as most my models really are). There is this dreadnought arm foot rest coming with the model, so I decided to add some more debris to the base, like some concrete slabs, different plastic cutoffs that might look like they came from a dreadnought and some generic marine parts like should pads, helmet and bolt gun. The base will then be finished of with sand like the rest of my bases.


All in all I am very pleased with the progress so far. Now I am looking forward to starting on the armor. I am going to go for a subtle rainbow effect in the white metal to make it shimmer a bit. I have already tried out the scheme on the metal bands on the tip of the horns and on the handle of the spear, but I hope it will also look god on the larger surfaces.

Well that is it for now.

tisdag 3 januari 2017

Varangian legs


It is a new year and new projects, or at least new parts of old projects (but there are some new ones too, but more of that later). Today I started to play around with the leg pose of the Varangian. For this titan I decided to do a more advanced base than what I normally do (the bases for the others are really not very nice). I had this vision of the titan striding up a gentle slope, and steeping on/ crushing a burned out tank. This would involve some sort of stride and an elevation between the two feet. And here I get to some ranting. I know I have said something similar about the Knight legs, which are of the same flawed design, but it bears to be repeated. Having the lower leg bend back beneath the knee is a really stupid design for a leg. It looks cool and helps bring the armor plating back inline with the leg, but from a functional point of view it is a no go. To be able to step up on to something you need to be able to bring your foot in beneath you center of gravity so that you can use the leg to elevate said center. This implies bending the lower leg backwards enough to get the foot beneath you as the thigh is lifted forward. The higher the thing is the further back the leg needs to bend to achieve this. This will of course also influences the design of the ankle and its movement (but I will not discuss that as it is not limiting in this case). I do understand that a Warlord, or a Knight for that matter is not supposed to climb mountains, but the whole reason to have a bi-pedal war machine is that it should be able to traverse uneven terrain were tracked vehicles can not go.


So looking at the warlord leg and its movement, one quickly realizes that the difference in length between the fully extended and the fully bent leg (with a line going through the foot joint and the hip joint) which is the highest obstacle the titan can step up on to, is only a few centimeters (~3 cm). So this 60 cm (give or take) model can only step over/onto 3 cm high obstacles, that is as if a human being of 175 cm could only step up on to a 9 cm high object. A warlord could barley make it of the street due to the curb if it was human sized.


Well, I am not going to redo the legs so I have to live with what I have (and perhaps make a few small changes) to get the pose needed. My idea is to have it step onto a burned out chimera at the side of a road. Due to the limitations of the legs one foot can not be more than 3 cm higher than the other, if it should look like the titan is not just resting its foot on something, which would probably not take the weight any way. This later fact is what saves me this time. As the chimera is higher than 3 cm I can not just place the foot on top of if as per previous reasoning would not be possible for the titan to do if it meant to stride over it. However, the weight of a warlord is so large that not even an armored transport would take its weight on its roof, so it needs to squashed, which then brings the wreak in under 3 cm. I am aiming for a 2-2.5 cm height just to be on the safe side. I also decided to raise the back foot to show some forward motion. I realize that this might not be the smartest thing as this foot will take most of the weight on the toes and not to foot ring. But I am sure that if the toes are glued in solidly and pinned it should be ok.

All these things makes the build of the base a bit tricky, but also give me a great opportunity to make a nice diorama that complement to model without overshadowing it.